
a crazy shooting experience Hiding Spots on the Station
Named corners from the official western thumbnail, ranked by how long they keep you alive.
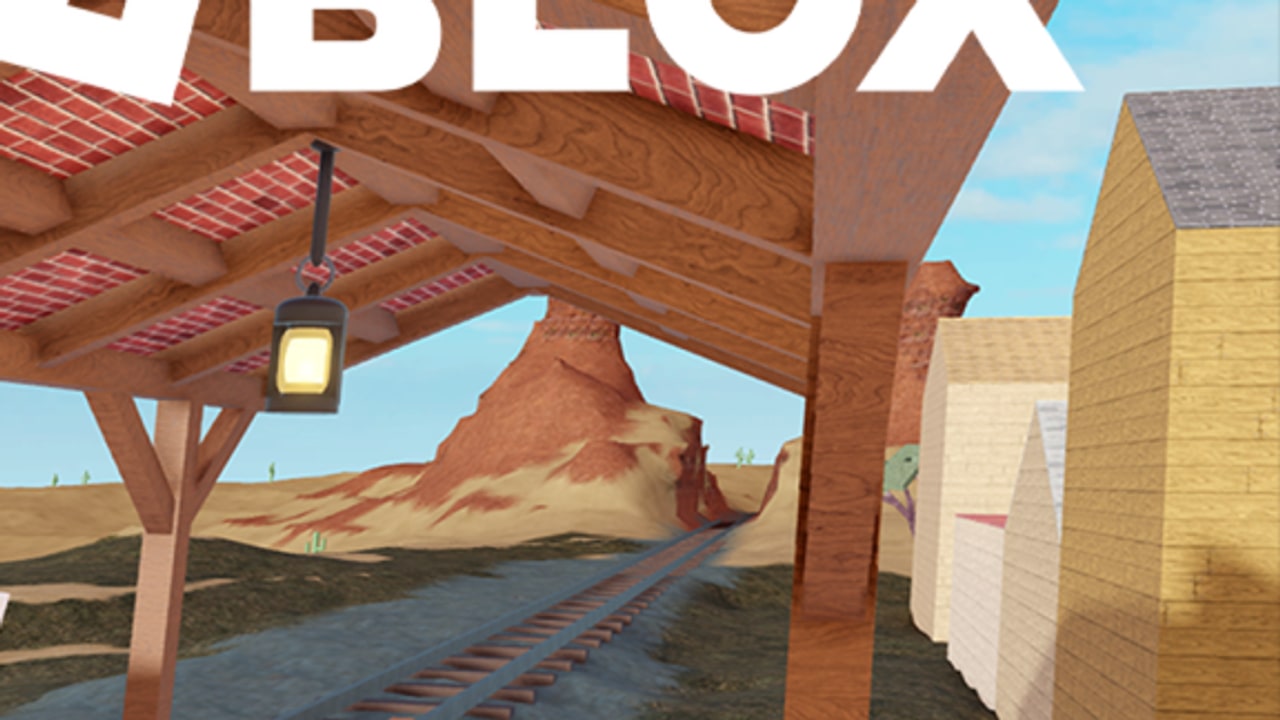
The live thumbnail for a crazy shooting experience is not marketing art. It is a first-person photograph of the round: wooden porch, brick-lined roof, hanging lantern, railroad, sandstone mesa, cactus, timber buildings. This page names those pieces as hiding spots so you can pick a first position in the lobby. It is the map companion to how to survive. Shooters should read it as a search list and then open how to win as the shooter.
There is no second published map in the media API. Until updates says otherwise, this station is the whole atlas.
S-tier: wooden interiors
The yellow timber buildings on the right of the overview shot beat everything else. You get two walls, a door sound cue, and a back alley. Sit off the doorway, not in it. If the shooter swings the door, they should see empty floor, not your hat. Giant hair packages clip above crates — fix that on loadouts.
Second room in the same building is better than a new building. Relocating across the open gap is how porch-to-building runners die. Plan one interior and one backup interior, then stop touring.
A-tier: porch underside, off the lantern
Under the roof is the thumbnail’s camera. It is also spawn-adjacent, so the shooter checks it first. The trick is off-axis: not centered in the yellow lantern cone, not standing on the open platform edge. Hug a post. Crouch. Watch feet on the boards.
If you hear the hunter commit down the rails, you may relocate to an interior. If you hear them still on wood, stay. Peeking “to see” is how the lantern paints you.
The hanging lantern is a landmark, not cover. Do not hide in the lamp.
B-tier: railroad ditch
Beside the tracks, not on them. The vanishing point toward the mesa is a shooter sightline. The ditch only works if you are prone to the shooter’s current angle and ready to crawl toward buildings, not toward the hill. If they start walking the line, you are already late. Leave to an interior — do not stand up on the sleepers.
C-tier: cactus flats
They photograph well. They hide nothing. R15 avatars are taller than the plants. Use cactus only as a one-second break in a sprint toward a building, never as a camping spot. New players die here because the thumbnail puts green in the left third and their brain says “cover.”
F-tier: mesa skyline
The sandstone mesa is a postcard and a trap. You silhouette, you rotate slowly, and you cannot hear porch footsteps from up there. The only time the mesa is acceptable is when the shooter is already confirmed in cactus and you have a pre-planned descent. That situation is rare. Default is: do not go.
Named angles worth practicing in spectate
- Lantern glare peek: from outside looking in, the lamp whites out a crouched survivor. From inside looking out, you see the shooter’s legs first. Survivors want inside. Shooters should step inside to cancel the glare.
- Alley between timber buildings: short, loud, easy to overpeek. Hold the corner; do not run the full alley.
- Porch beam shadow: the brick ceiling stripes create dark bands. Sit in a band, not between bands.
- Track curve: if the rails bend, the ditch on the inside of the curve is less visible from the mesa. Still B-tier.
Practice these by dying on purpose once and spectating, as getting started suggests. The experience has no firing range.
Spots that become traps after one death
Once a teammate dies in a doorway, that doorway is burned for the round. The shooter will re-swing it. Do not reuse a burned interior. That is the only time you should take cactus or ditch as a path to a fresh building.
Chat that says “hide porch” burns the porch. Mute it. Public callouts are how 1vAll hunters farm. Role logic is on how to play.
Device notes
Mobile survivors should refuse the railroad. Fine camera work on a ditch is a PC luxury. Console players can hold interiors well if look sensitivity is not a flick-fest — controls.
Tie this to the rest of the wiki
- Rank of each landmark: maps tier list
- Survivor mindset: survivor role
- How the hunter searches these spots: shooter role
- What not to wear while sitting in a beam shadow: loadouts
Hiding is not cowardice in a 1vAll. It is the win condition. Pick an S or A spot, relocate once at most, and let the shooter waste time on the mesa.
Frequently Asked Questions
Quick answers to the most common questions.
What is the best hiding spot?
A wooden interior off the doorway. Porch underside is next if you stay out of the lantern cone.
Is the mesa a good hide?
No. You silhouette and rotate slowly. Leave it to tourists and to the shooter's last check.
Can cactus hide me?
No. Use it only as a sprint break toward a building.
Should I reuse a spot after a teammate dies there?
No. That angle is burned. Move to a fresh interior, not onto the rails.